 |
| First Block-Of-The-Month quilt (~2000), finally finished (2013). |

Sunday, November 17, 2013
First Block-Of-The-Month Kit -- Finally Finished
The very first full-sized quilt kit that I ever bought was a block-of-the-month from Joann's, when I still lived in Boston. That was awhile ago -- indeed, another lifetime ago! Well, in a just-get-it-done mood, over the past year, I finally finished it! The blocks were actually pretty challenging, but were made more so by the fact that the cutting had not always been done super accurately (the kit came in a series of 12 blocks, with the individual pieces for each block already cut out). So, not an ideal project for a beginner at all. As a result, there is one block with a MAJOR piecing booboo; can you find it?! When I see it, it makes me cringe ... but on the other hand I kind of like it because 1) it makes me laugh, and 2) it shows the progression in my quilt piecing skills because that's not a mistake I would make now! Because this will be a quilt to use, I just had a simple and inexpensive large stipple done by B&B Machine Quilting (Orland, CA). I still love the colors -- muted greens and pinks -- and it will now be "The Living Room" quilt since it coordinates with the couch's colors. Another long-term UFO is now out of storage and off my list!

Friday, November 15, 2013
New bedroom quilt display
My Dad installed this for me last weekend; I finally have a place to hang my quilts!:
 |
| Two drapery rods for quilt hangers. |
Celebrate November
A few weeks ago I made another little table-topper quilt, this one for November. I used four different fat quarters that I'd had fun choosing while at the big PIQF show in Santa Clara last month. The bird fabric had several different species on it, but I chose the Cedar Waxwings for the focus. As luck would have it, I just recently saw a small flock of them at very close range, in a tree at the Amtrak Martinez station! They migrate through here this time of year, so I think it was a good choice for this month's quilt decoration.
 |
| Small table-topper quilt. |
 |
| Our new glass pumpkin for fall. |
Friday, October 25, 2013
Hawaiian Memories
I found this wallhanging kit at one of my most favorite quilt stores, Quilt Passions of Kailua-Kona, Hawai'i. I made it first for my Aunt & Uncle, to commemorate our trip (with my parents) to Big Island, Hawai'i in March 2011:
The kit contained all of the fabric (except for the binding & back), including the Quilt Passions custom turtle batik for the border. I used Printed Treasures to inkjet our trip pictures onto fabric, cut & pieced the wallhanging, sandwiched with Warm & Natural batting, and did minimal quilting with stitching in the ditch.
 |
| Hawaiian Memories Wallhanging, Jessop-Taylor Trip 2011. |
To commemorate my parents' time on Big Island when I lived in Hilo, I recently made a second wall-hanging using the same kit pattern:
 |
| Hawaiian Memories Wallhanging, Jessops 2006-2008. |
I used a slightly larger border, and sandwiched with fusible fleece batting. I've been experimenting a lot lately with fusible battings, with mixed results. In this case the quilting process was easier, and I did less quilting, but I don't like the way some of the fabric of the top ripples from being glued down. I think from now on I'm going to go back to tried-and-true pinning for sandwiching. I found the 22-inch quilt hanger at Joann.com. Below are close up shots of each of the three blocks in the wallhanging:
 |
| Close up of top block, clockwise from top left: Holly & Mom in the marine science lab; Dad & Holly at Richardson Beach Park in Hilo; Lava entering the ocean near Kalapana; Mom & Dad at Waipio Valley Overlook. Middle: Mom, Dad, & Holly at the rim of Halema'uma'u Crater. |
 |
| Close up of middle block: Hanging loose with the shaka sign in Pahala. |
 |
| Close up of lower block, clockwise from top left: Dad at Kilauea Iki Overlook; Mom with Pele at Kilauea Art Center; Dad & Mom at the Kailua-Kona Coffee Festival; Dad on the Kona Coast. Middle: Holly at Pololu Valley Overlook. |
Printing photos onto fabric was a rather frustrating endeavor. The sheets would often jam, rendering them unusable -- which was a rather expensive loss at $3+ per sheet. And, the photos would not always print in the location expected on the fabric sheet, despite trial and error using regular paper first. I used PhotoShop to darken the photos a bit before printing, because they tended to look a little washed out printed on fabric. Despite these difficulties, I'm glad I persevered with the photo printing! Our wallhanging is now hanging in the entryway.
Wednesday, October 23, 2013
Happy Halloween
I recently made another little quilt for our table-top hanger, this one for Halloween! I was inspired by a strip "spider" quilt that I saw recently. I've never done a hexagon block either, so that was interesting! For some reason we don't have much orange fabric in the stash, so I picked up a variety of (cheap!) quarter yard cuts while at Walmart (which led to a math lesson because neither of the women at the fabric counter knew or could figure out that a "quarter of a yard" was "0.25*the-1-yard-price, sigh). To make the block, I pieced strips of random widths until I had the size I wanted, and used a 60-degree triangle ruler to cut out the triangle shapes. After arranging and piecing the triangles together, I machine appliqued the hexagon onto a black background. For quilting, I stitched in the ditch with black thread and added the spider's hanging web using a decorative machine stitch. And, I had enough left-over triangles to make a small table-topper. I adore the color combination of orange-and-black, so I really like how these came out.
The beaded spider came from Violin Stars Beaded Spiders -- a fundraiser that I very luckily found a few years ago when I was looking via a Google search for a quilt embellishment to represent a Hawaiian Happyface Spider! They are wonderful spiders, and I should probably get some more while they're still making them!
The beaded spider came from Violin Stars Beaded Spiders -- a fundraiser that I very luckily found a few years ago when I was looking via a Google search for a quilt embellishment to represent a Hawaiian Happyface Spider! They are wonderful spiders, and I should probably get some more while they're still making them!
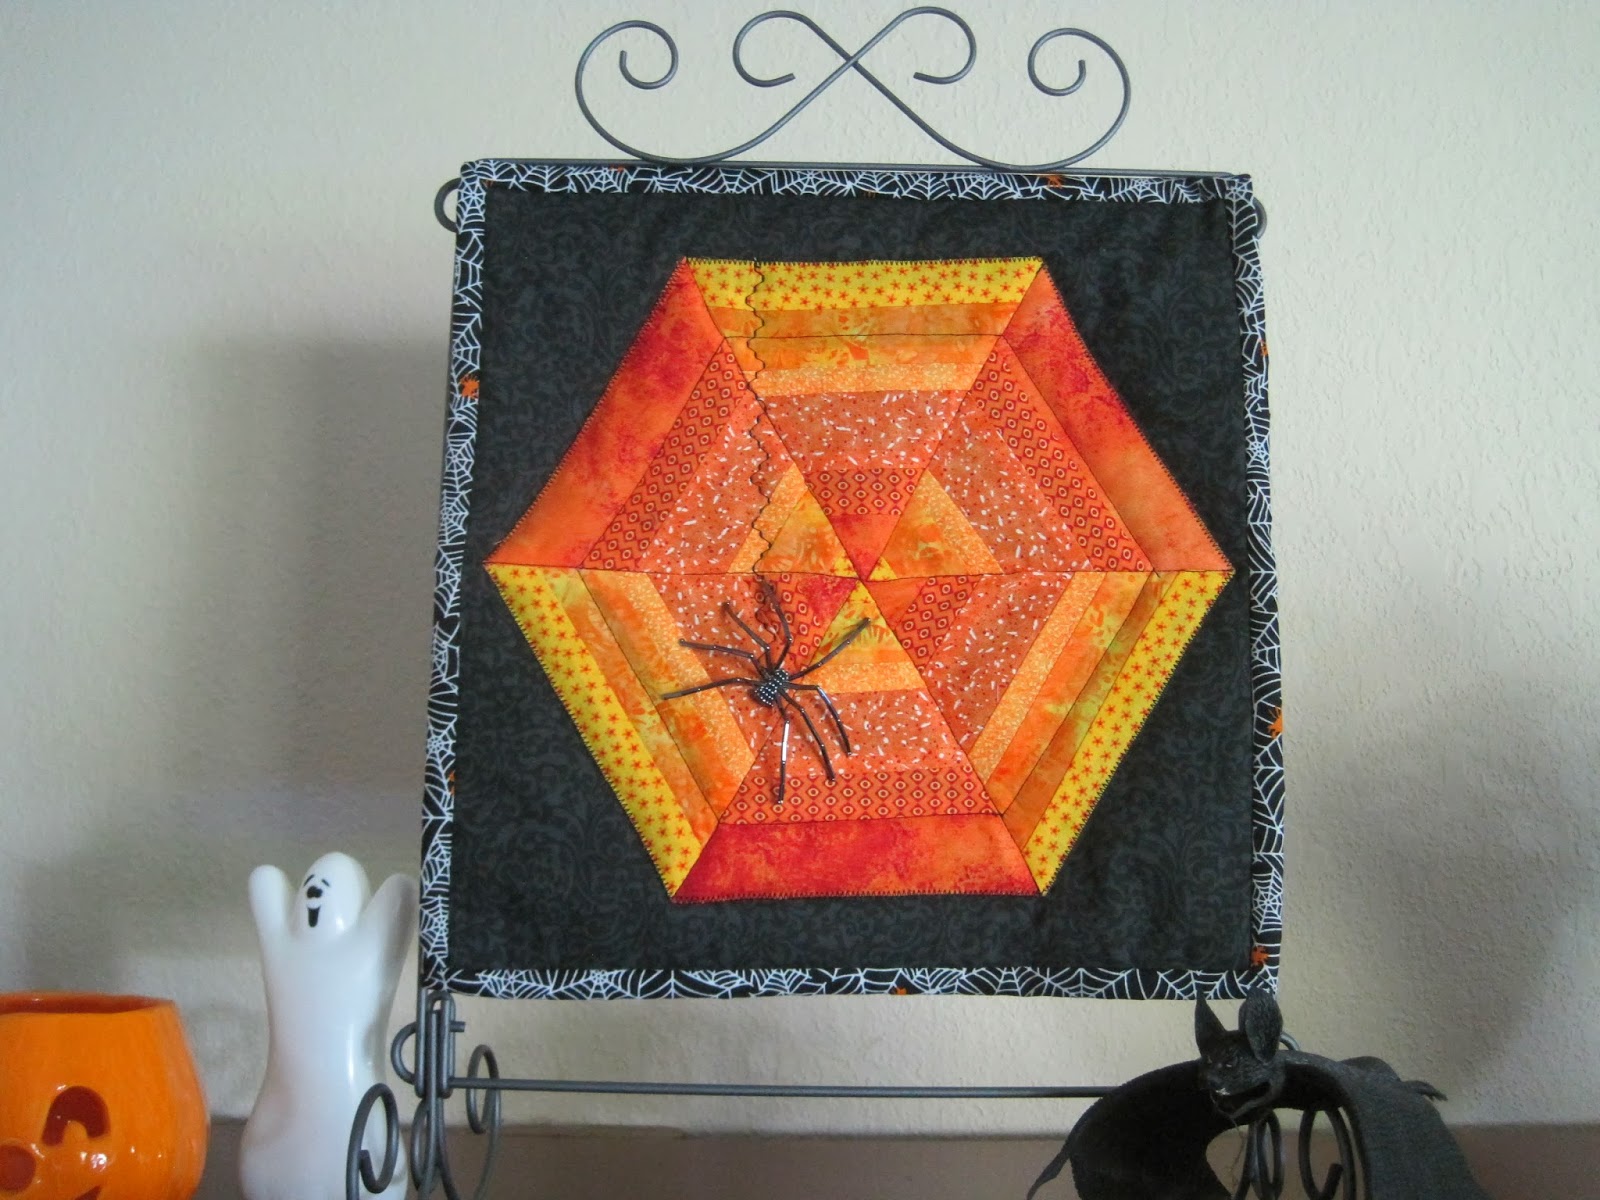 |
| A spider-y wallhanging for Halloween. |
 |
| A spider-y table-topper for Halloween. |
Tuesday, October 22, 2013
Heron Pond Wallhanging
This was the first quilt kit that I ever bought (I think over ten years ago?)!: "Heron Pond" by McKenna Ryan Quilt Designs. I still love it, and this past January decided to finally make it. I mostly used the fabrics that came with the wallhanging kit, except for the border and the dragonflies. I think McKenna Ryan's finished version has better contrast, but I do absolutely love the water-y batik fabric that I used for my border. The fusible batting that I used is now causing a bit more rippling than I like, especially in the border fabric ... I'm hoping this might subside after awhile (I really don't want to wash it). So, this project was another experiment with fusible batting that wasn't a huge success. Although I suppose I could pretend that the rippling effects are an intended water-y artistic feature! I also experimented with getting "braver" in my free motion quilting attempts, and am a bit happier this time with the results. Finally, I used some flat-ish copper-like beads for embellishments: the small dragonfly and two leaves near the lily pad. The binding fabric was a bargain find at a recent quilt show.
 |
| "Heron Pond" |
Monday, October 21, 2013
Raven Says Hello!
My Mom found this fabulous raven applique pattern during her travels in Alaska last summer, called "Raven Says Hello!", by Cindy Shake Designs. We both love all corvids, but especially ravens (if you've never read Bernd Heinrich's Mind of the Raven, check it out!). So, I decided to make this wallhanging for my Mom's birthday this year. I didn't quite make that deadline, but finally finished it recently. I chose Kaffe Fassett fabrics from the Millefiore collection, used buttons for the eye, and embellished the lower right corner with a cute house button. It finished about 15" square, and is hung from a quilt hanger that I recently purchased from Joann's.
 |
| Raven Says Hello! |
Subscribe to:
Posts (Atom)